How to Embed Google Reviews on Your Website for Free
Complete tutorial on embedding Google reviews on any website without paying monthly fees. Works with WordPress, Wix, Squarespace, Shopify, and custom HTML sites.

Introduction
Customer reviews are one of the most powerful tools for building trust and credibility online. Studies show that 93% of consumers read online reviews before making a purchase decision, and displaying Google reviews directly on your website can significantly increase conversion rates.
While many review management platforms charge hefty monthly fees, this guide will show you how to embed Google reviews on your website completely free using ReviewConnect' free tools. This method works for any website platform including WordPress, Wix, Squarespace, Shopify, or custom HTML sites.
Benefits of Embedding Google Reviews
Before diving into the tutorial, here's why you should consider adding Google reviews to your website:
- Build instant trust with potential customers
- Improve SEO by adding fresh, keyword-rich content
- Increase conversion rates by showcasing social proof
- Save money compared to paid review management platforms
- Maintain control over which reviews to display
Step-by-Step Guide
Step 1: Create Your Free Account
- Navigate to ReviewConnect APP
- Click on "Sign Up" or "Create Account"
- Enter your email address and create a password
- Verify your email address through the confirmation link sent to your inbox
- Log in to your new account
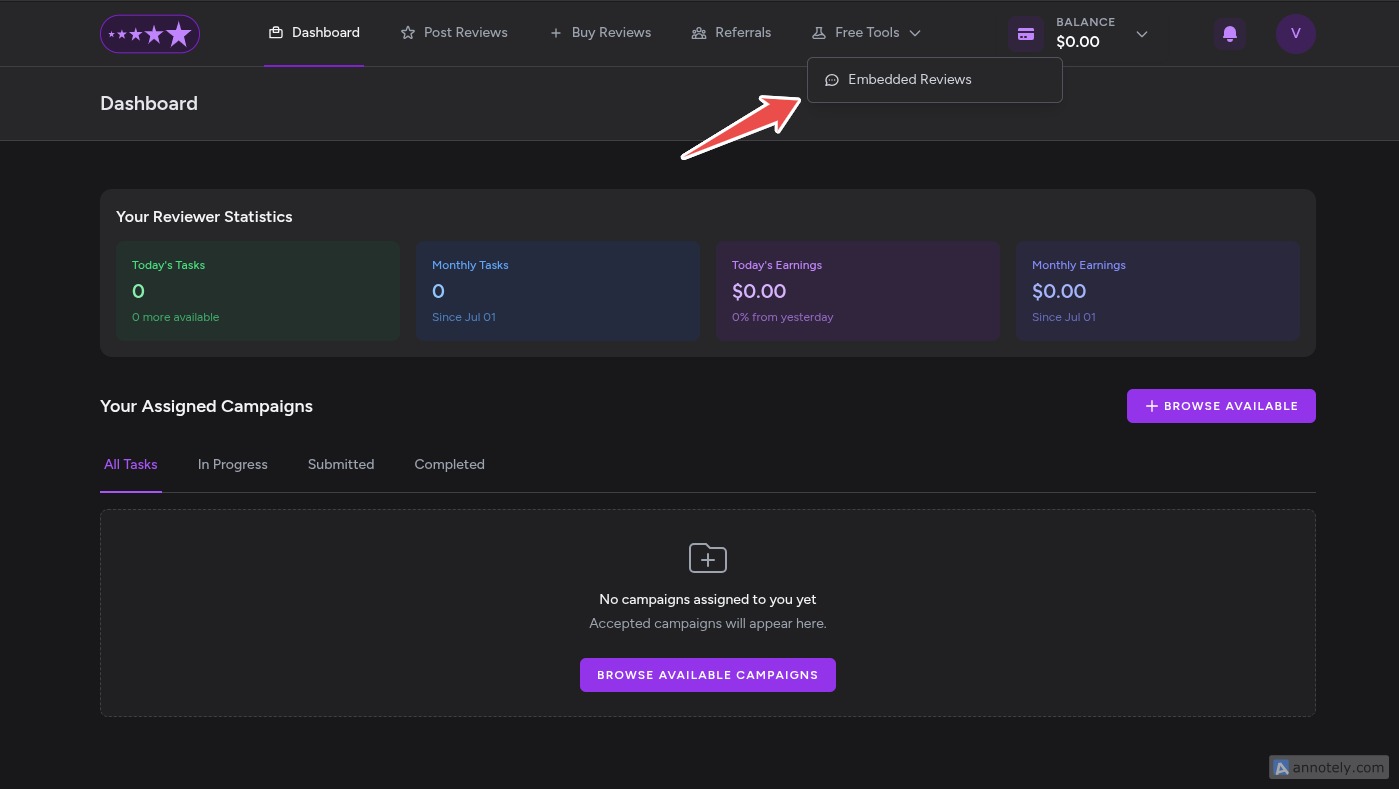
Step 2: Access the Embed Reviews Tool
- Once logged in, look for the "Free Tools" menu in the navigation bar
- Click on "Free Tools" to expand the dropdown menu
- Select "Embed Reviews" from the available options
- You'll be directed to the review embedding dashboard
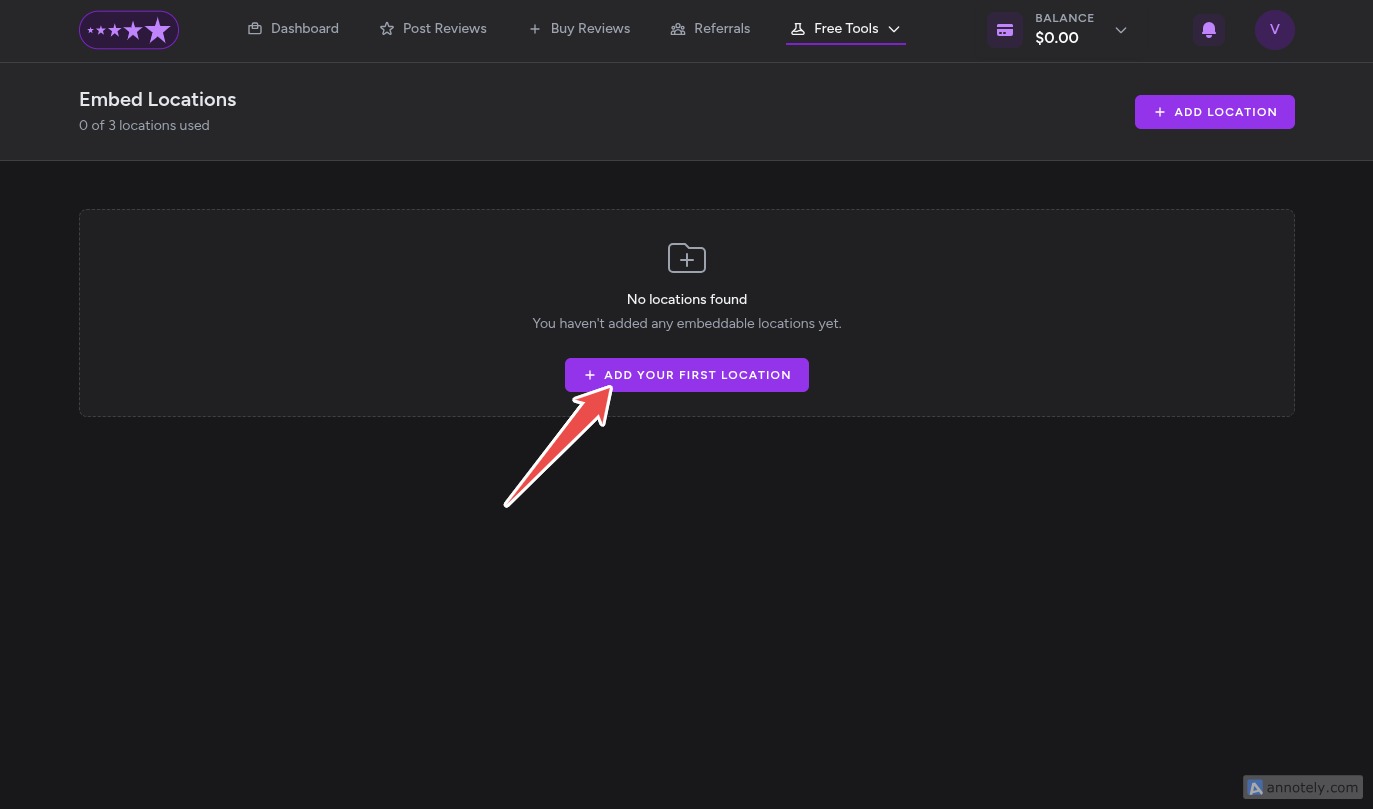
Step 3: Add Your Google Maps Location
- In the Embed Reviews dashboard, click on "ADD LOCATION" to start:
- Select your country from the dropdown menu first (this helps narrow down search results)
- Search for your business using the exact name as it appears on Google Maps:
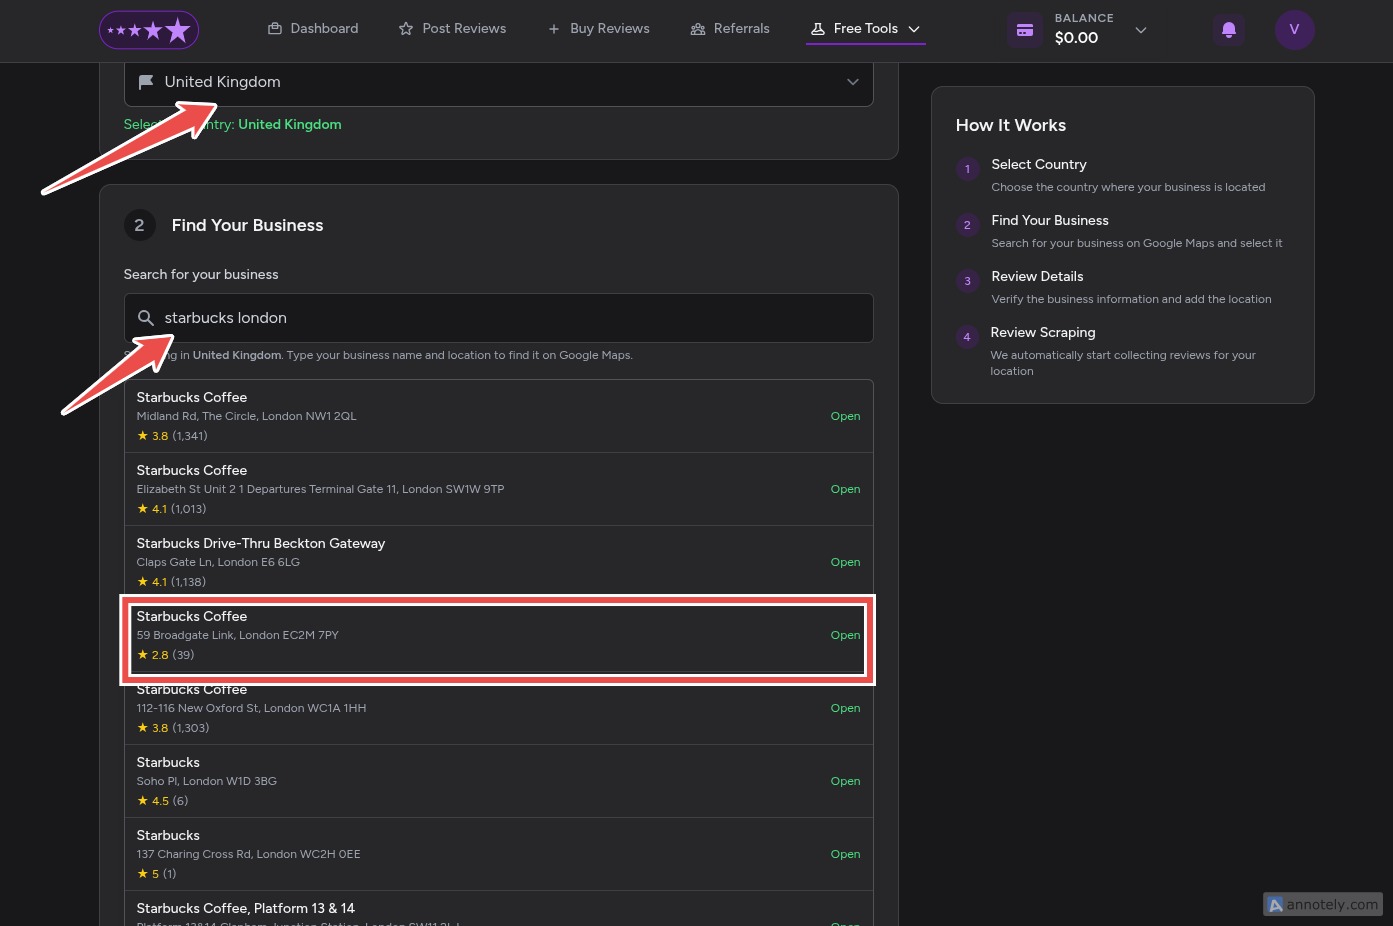
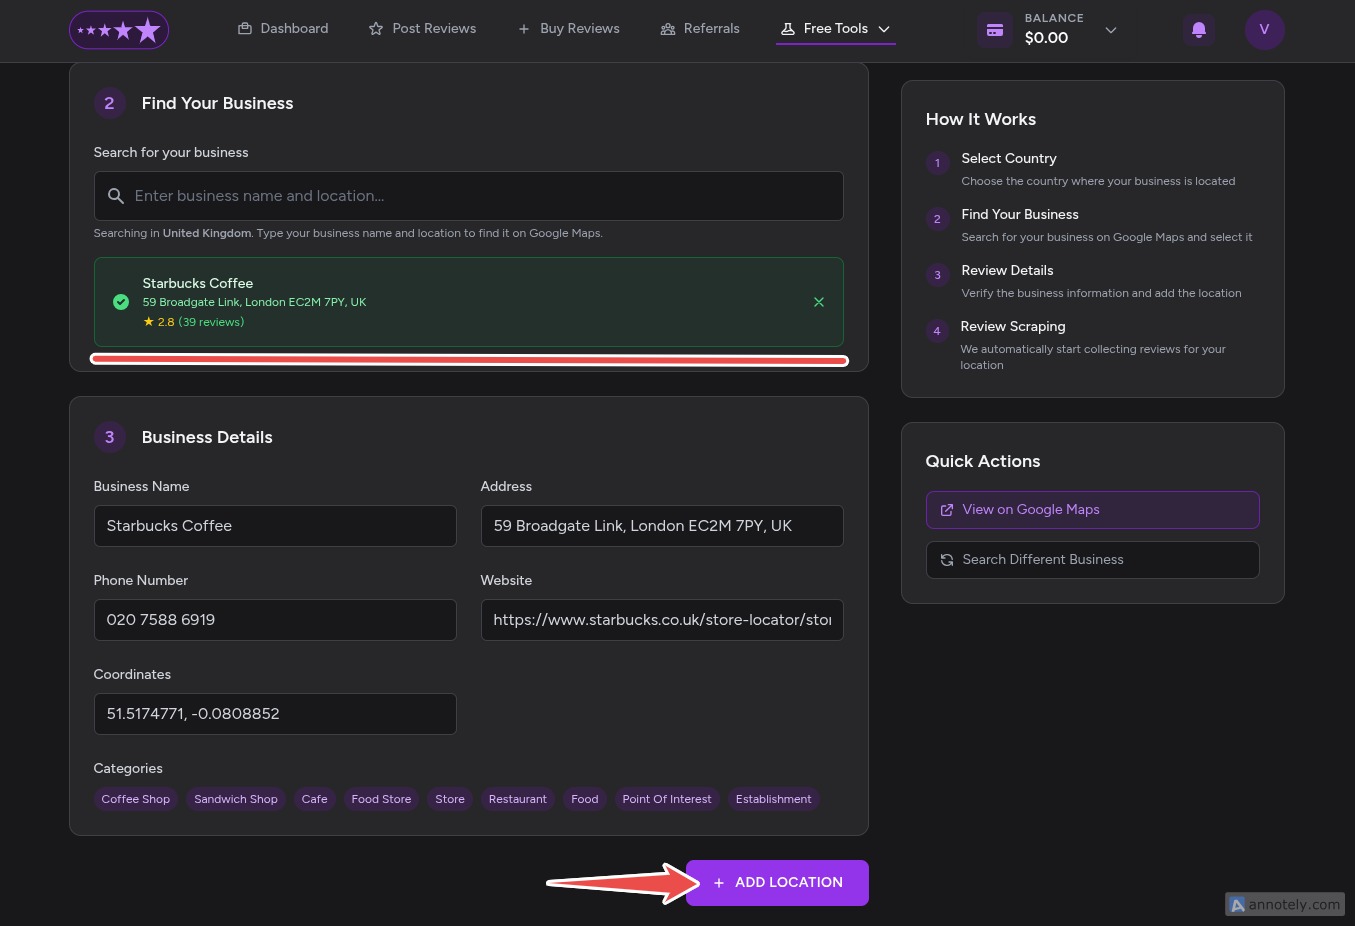
- Review the search results and select your company from the list
- After confirming your business details, click the "ADD LOCATION" button:
- Wait approximately 20 seconds while the system imports your Google reviews:
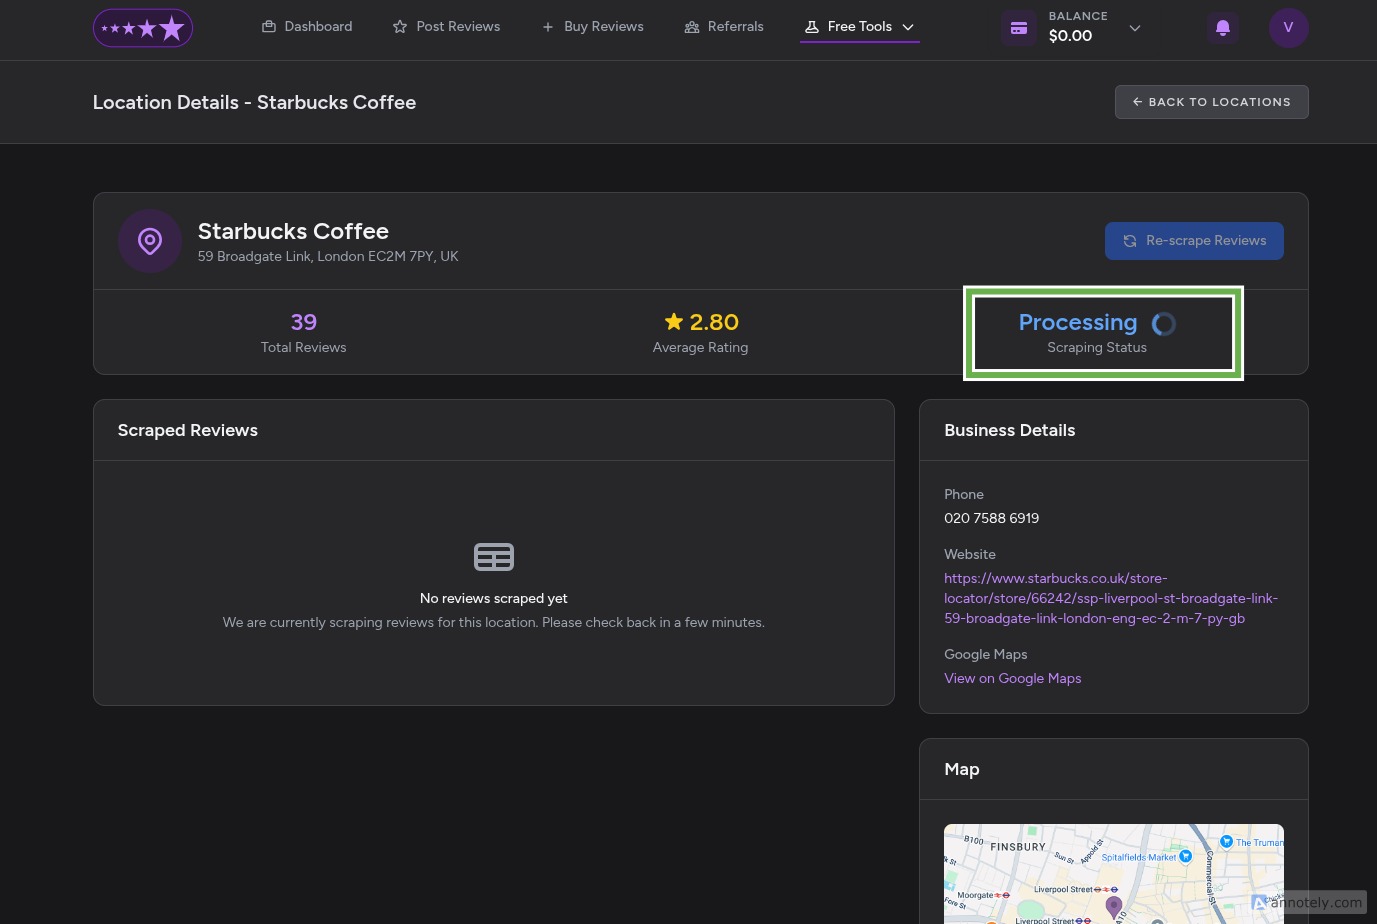
- Once completed, you'll see your imported reviews:
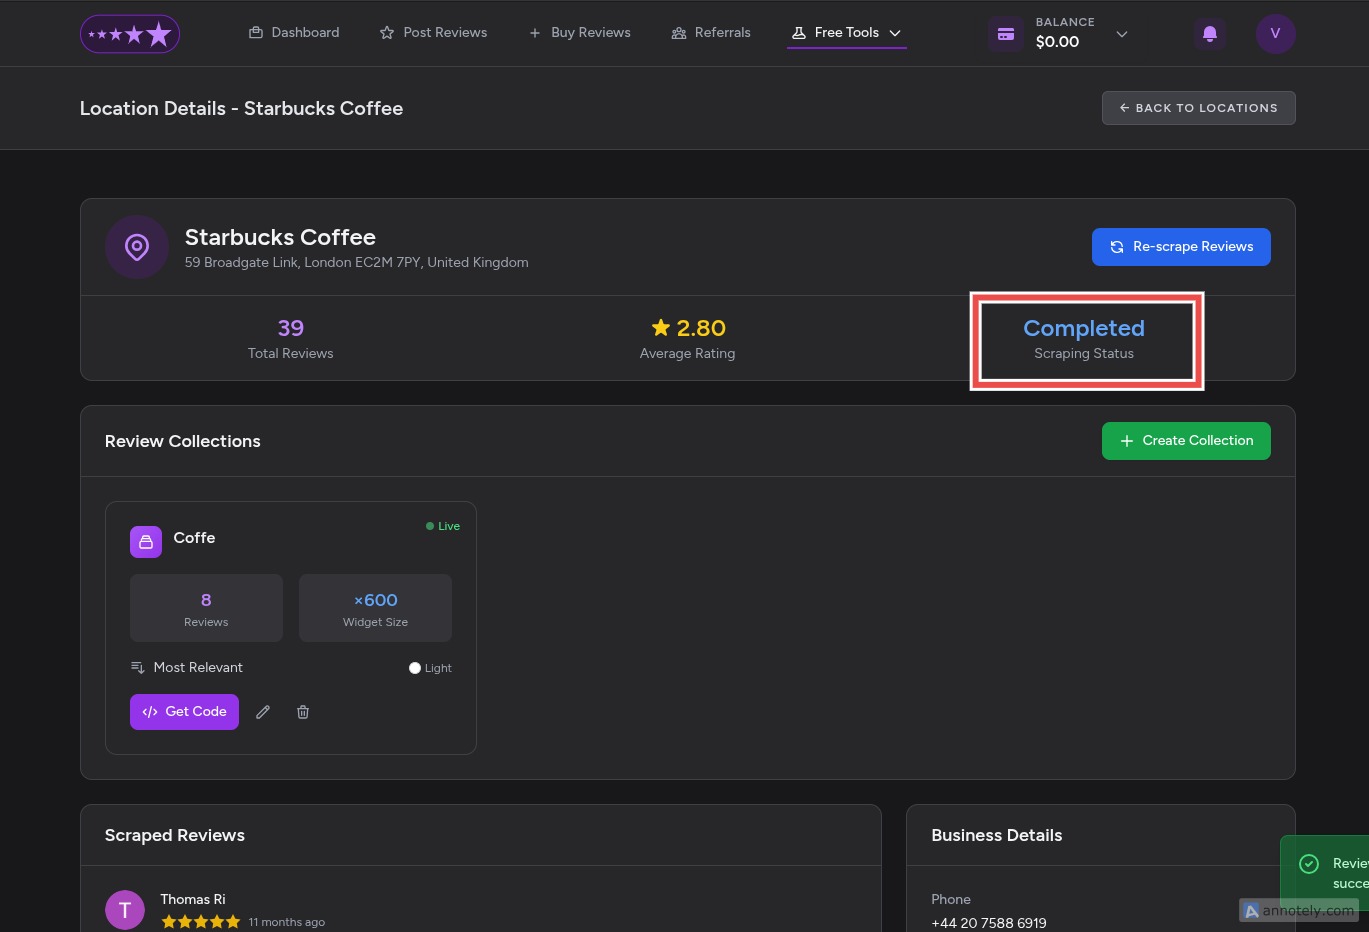
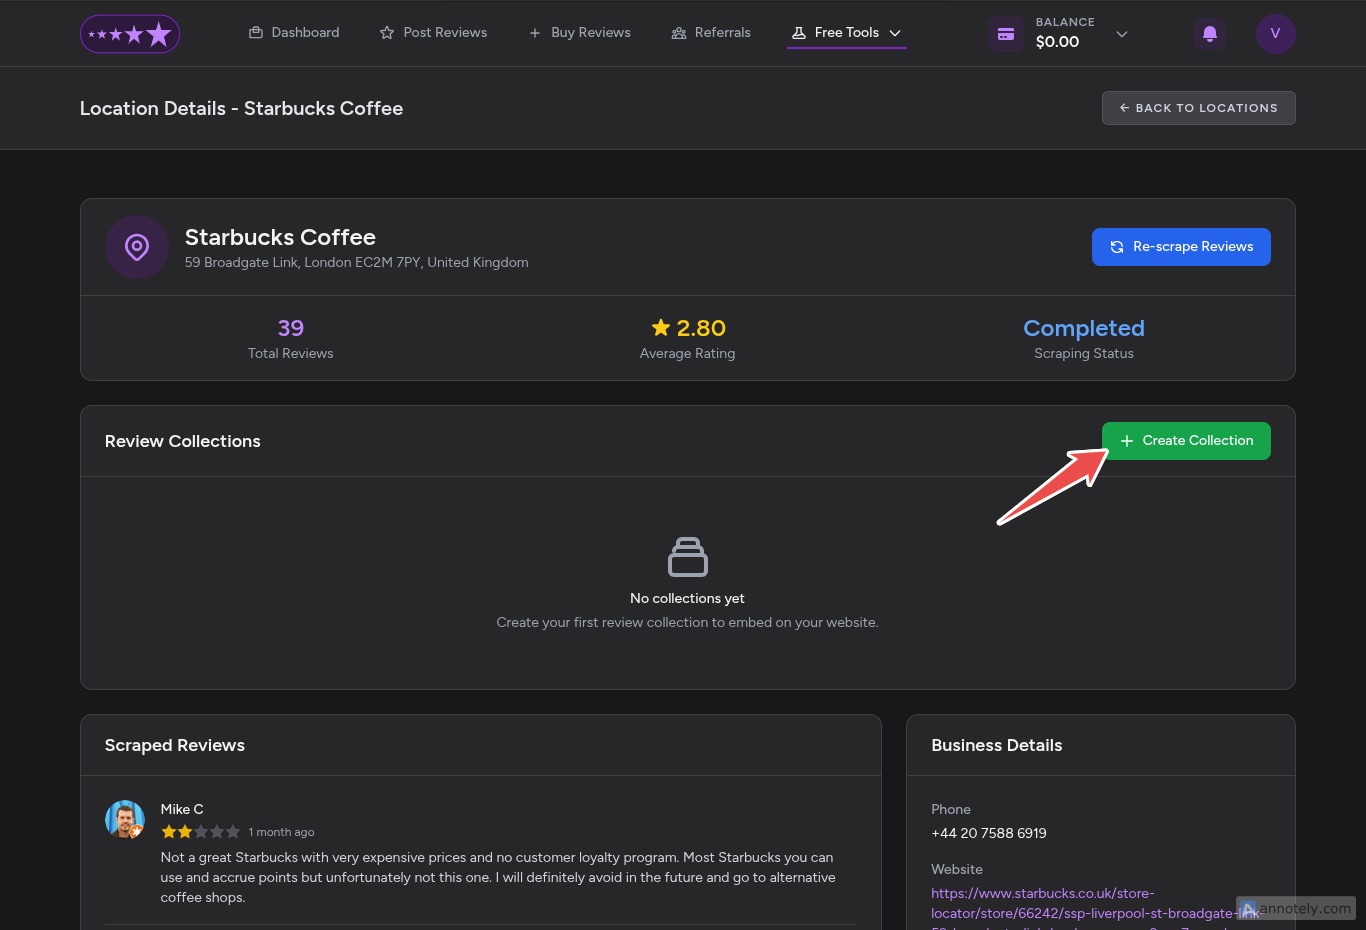
Step 4: Create a Review Collection
Review collections allow you to filter and organize your reviews based on specific criteria. This is particularly useful if you offer multiple services or products.
- Click on "Create Collection" (green button):
- Set your collection name and number of reviews:

- Configure your review filters such as rating range, keywords, and date range:
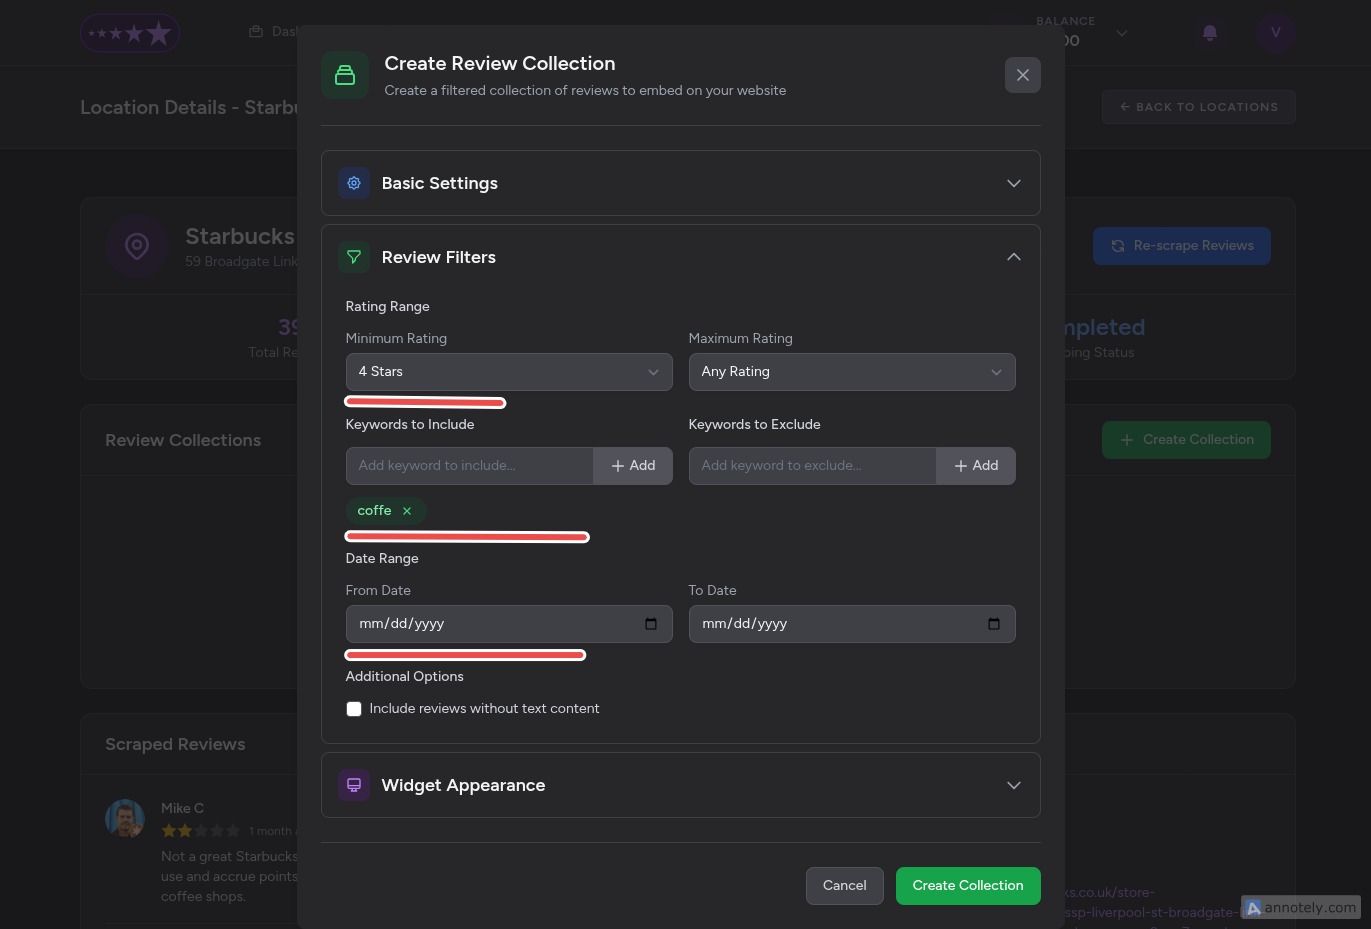
- Customize your widget appearance with themes, layout, and display options:
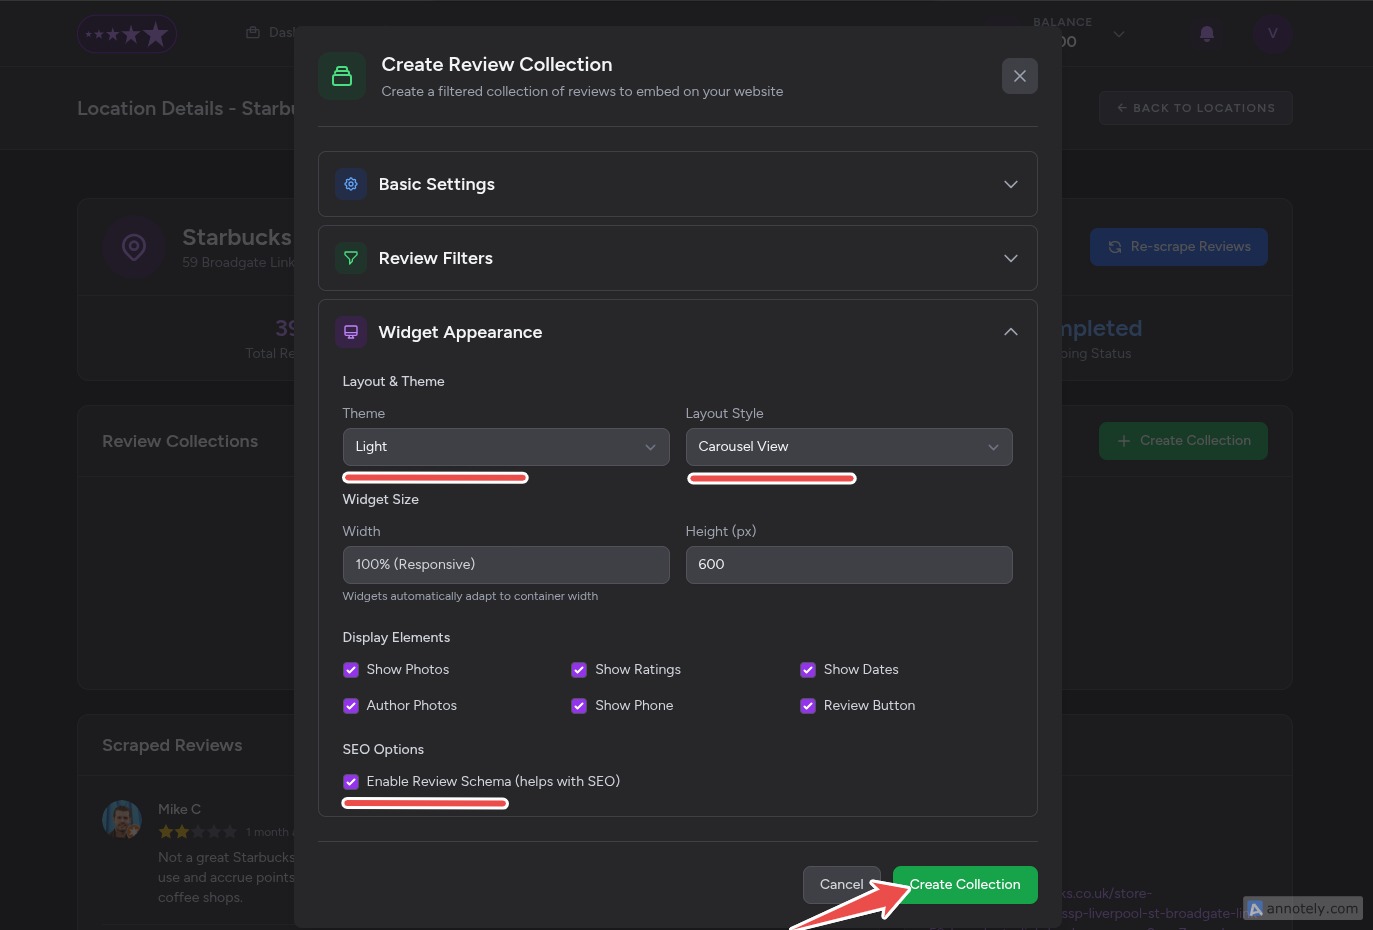
- Click "Create Collection" to save your configuration
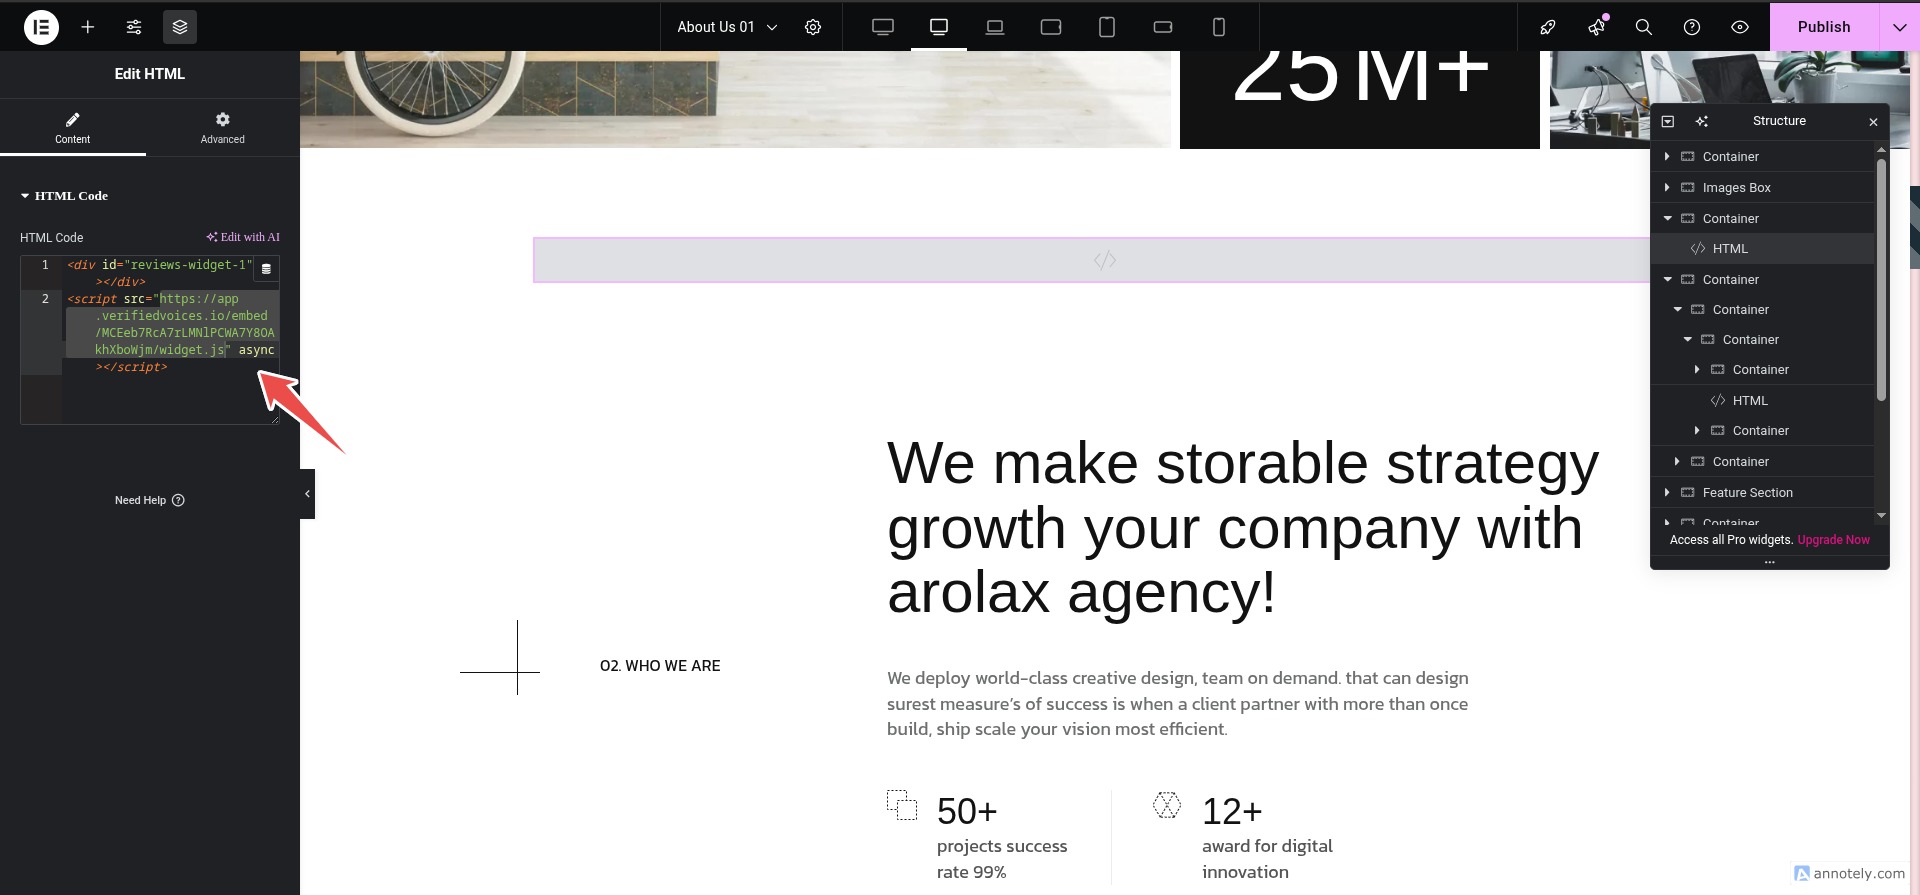
Step 5: Get Your Embed Code
Once your collection is created, you'll need to generate the embed code:
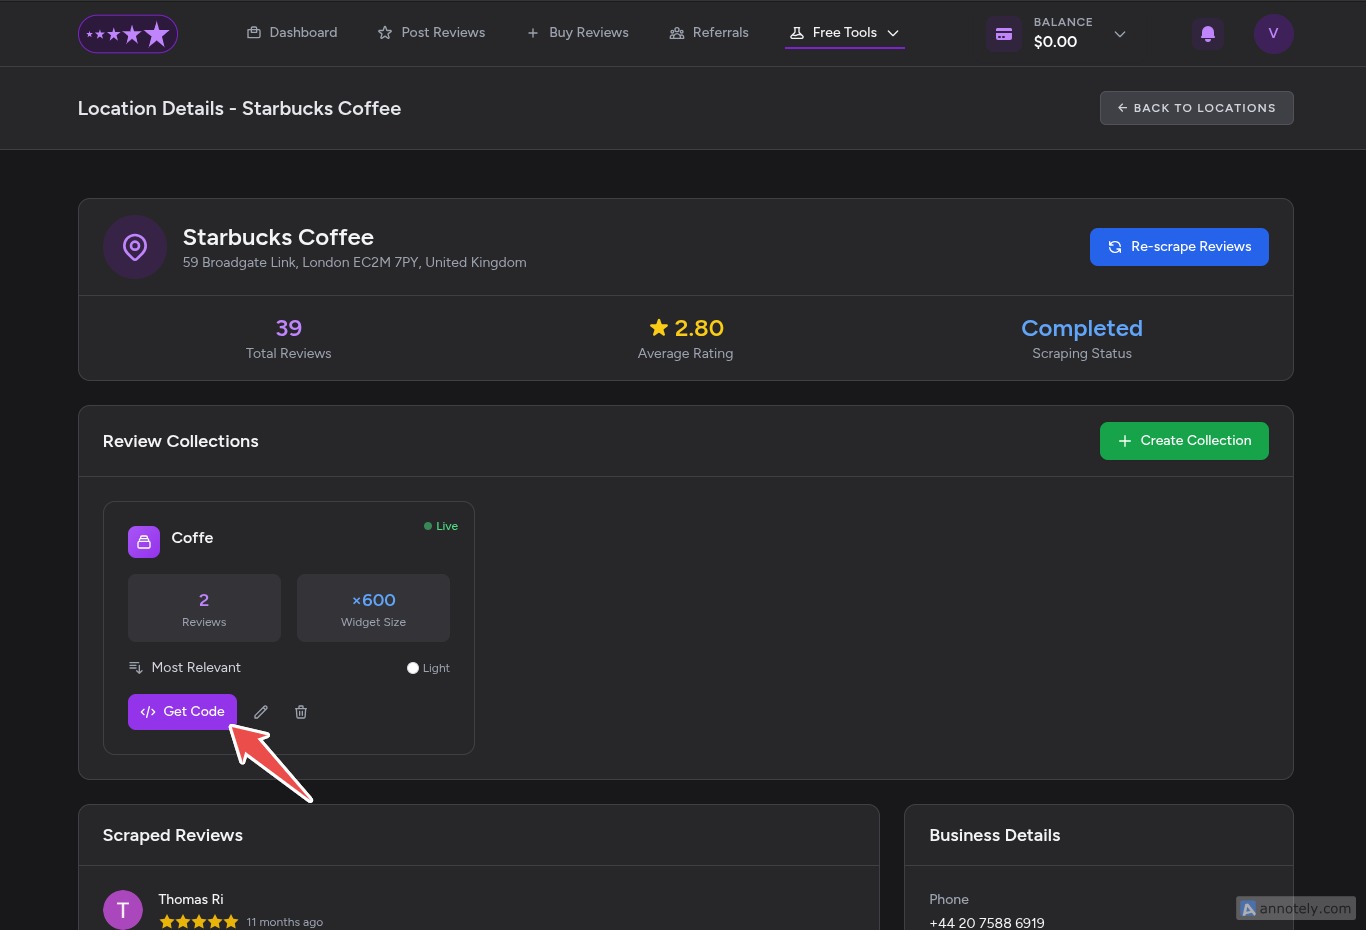
- Find your saved collection and click on "Get Code":
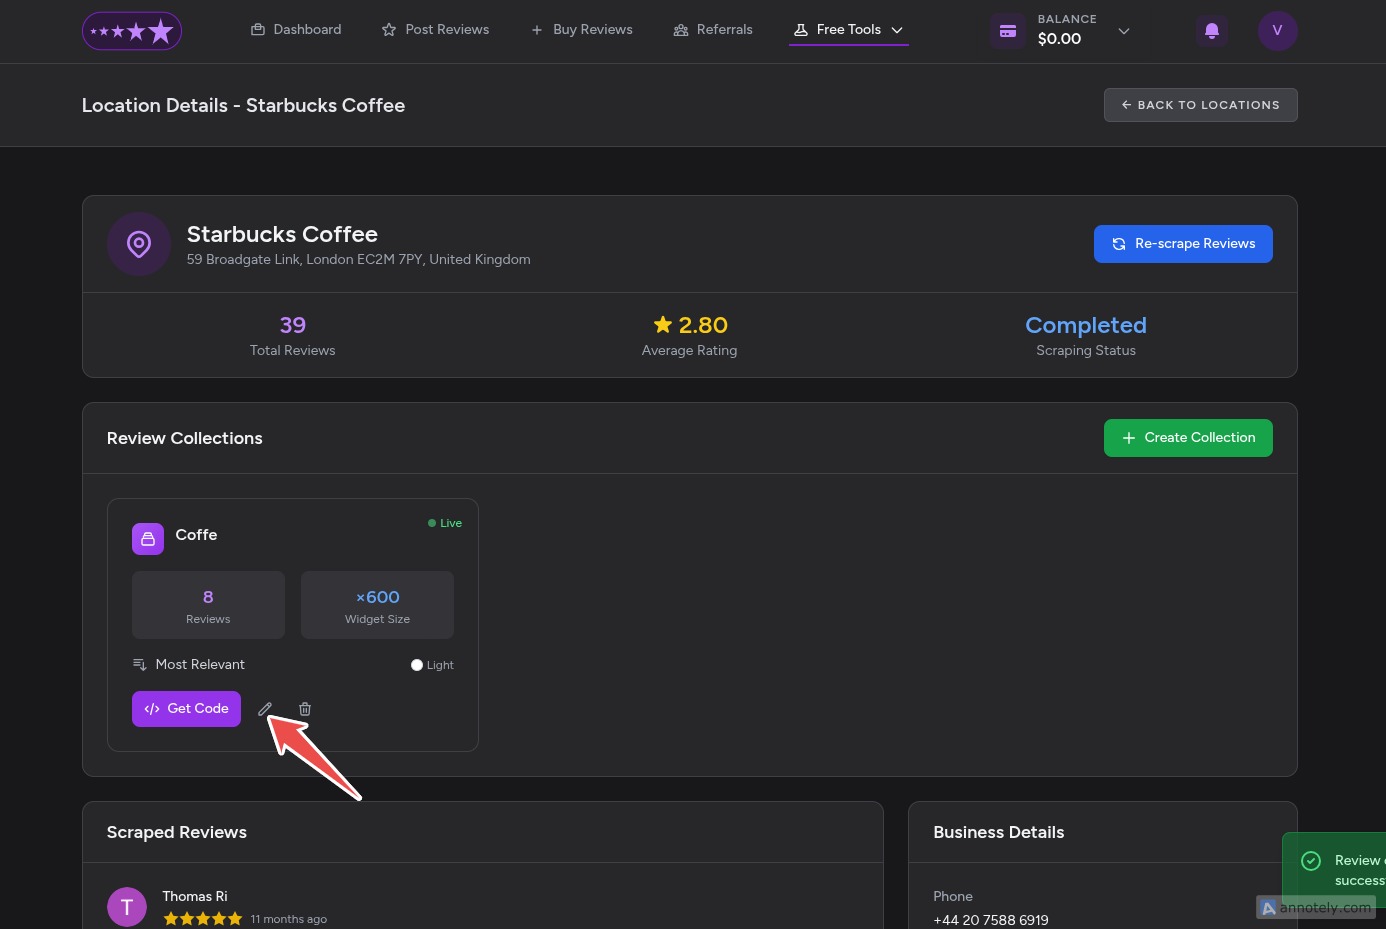
Note: You can also edit your collection anytime by clicking the edit pen icon:
- Choose your embedding method and copy the generated code:
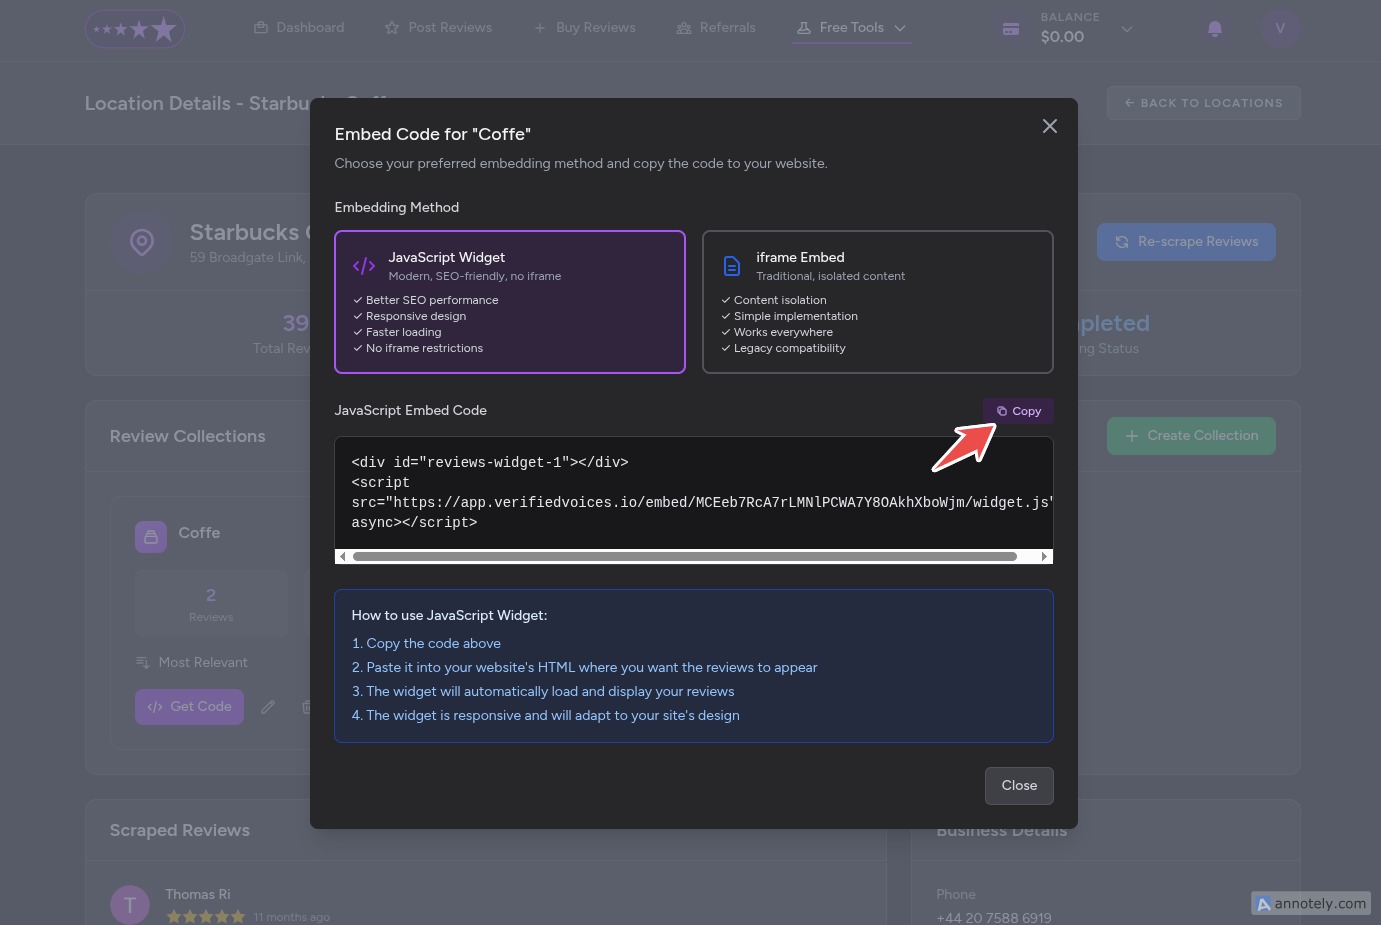
- Choose between two embedding methods:
Option A: JavaScript Embed (Recommended)
- Benefits:
- Better for SEO as content is directly indexed
- Allows custom CSS styling to match your website design
- Faster loading times
- More flexible integration
- Best for: Websites where you have full HTML access
Option B: iFrame Embed
- Benefits:
- Better compatibility across all platforms
- More reliable on restrictive website builders
- Isolated from your site's CSS
- Easier to implement
- Best for: Website builders with limited HTML access
- Copy the generated code to your clipboard
Step 6: Add the Code to Your Website
The implementation process varies depending on your website platform:
For WordPress:
- Go to your WordPress dashboard
- Navigate to the page or post where you want reviews
- Add an HTML block or Custom HTML widget
- Paste the embed code
- Update or publish the page
For Wix:
- Open your Wix editor
- Click "Add" → "Embed" → "HTML iFrame"
- Paste your code
- Adjust the size as needed
For Custom HTML Sites:
- Open your HTML file
- Paste the code where you want reviews to appear
- Save and upload the file
Step 7: Customize the Display (Optional)
If you chose the JavaScript embed option, you can customize the appearance:
- Add custom CSS to match your website's design
- Adjust the layout (grid, list, carousel)
- Modify colors, fonts, and spacing
- Control responsive behavior for mobile devices
Best Practices
- Strategic Placement: Place reviews on high-traffic pages like your homepage, service pages, or near call-to-action buttons
- Keep It Fresh: Update your review collection periodically to show recent feedback
- Mobile Optimization: Test the display on various devices to ensure proper formatting
- Loading Speed: Monitor your page load times after adding reviews
- Legal Compliance: Ensure you're following Google's terms of service for displaying reviews
Troubleshooting Common Issues
- Reviews not showing: Clear your browser cache and check if the scraping status shows "Completed"
- Styling conflicts: Use the iFrame option if CSS conflicts occur
- Slow loading: Consider limiting the number of displayed reviews
- Missing reviews: Verify your business location is correctly selected
Conclusion
Embedding Google reviews on your website doesn't have to be expensive or complicated. With ReviewConnect' free tools, you can display authentic customer feedback within minutes, helping build trust with potential customers and improve your website's performance.
Remember to regularly check for new reviews and update your collections to keep your social proof current and relevant. This free solution provides all the essential features needed to leverage the power of Google reviews without the monthly subscription fees of premium platforms.
Have questions or need help? Visit the ReviewConnect support documentation or community forums for additional assistance.